1. Preview
Welcome to the Mobile CSP Hour of Code! Mobile CSP is a free high school course in Computer Science Principles using MIT’s App Inventor to build mobile apps.
There is a Toggle Tutorial button in the green bar at the top that you can use to open and close this tutorial pane:

Open each section of the tutorial below or click on the numbers above and follow along. Click on images and videos to enlarge them.
2. App Inventor User Interface
 App Inventor is a software development environment for designing apps for phones and tablets.
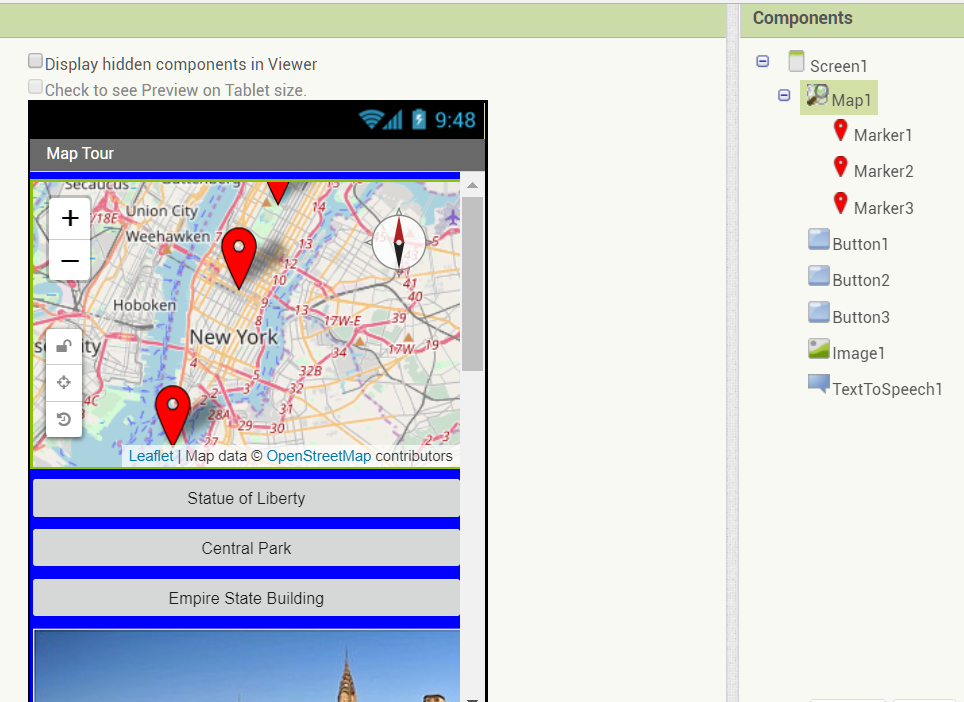
Follow this tutorial to design the Map Tour user interface: Enlarge Video
Here's a summary of what you saw in the video tutorial:
- Click on the Maps section in the left panel of App Inventor and drag in the Map component into the middle.
- Look up your town at https://www.latlong.net/ and grab its latitude and longitude to put in the CenterFromString property of your map.
- Add 3 markers and 3 buttons for the 3 landmarks in your tour.
- Add an Image component and find 3 images of your landmarks and upload them in the Media section.
- Click on the Media section and drag in a TextToSpeech component.
3. Code the Map Tour
Here's a summary of what you saw in the video tutorial:
- Click on the Blocks button at the top right to switch to the Blocks editor where you add the code to make your buttons and other components work.
- Click on Button1 and drag in a When Button1.Clicked event handler block.
- Click on Map1 and drag in a Map1.PanTo block and click on Marker1 to get Marker1.latitude and Marker1.longitude blocks and a Math 0 block to set the zoom level to 15.
- Drag in a set Marker1.fillColor block and choose a color, and a Marker1.showInfoBox block.
- Drag in an set Image1.Picture block and copy in the exact filename of the image that you uploaded for your first landmark.
- Drag in a TextToSpeech.Speak block and type in a fact about that location in a Text block.
- Right click the Button1.click event handler and choose duplicate. Change the duplicated block to Button2 and Marker2 and put in the fact and image for the second landmark. Right click to duplicate again and change it for Button3 and Marker3.
4. Connect and Run
Let's connect your mobile device to your App Inventor Project. Enlarge Video
Here's a summary of what you saw in the video tutorial to connect a mobile phone or tablet to App Inventor.
Click here if you don't have a device and here if you don't have WiFi available.
1. Download Companion App
 MIT AI2 Companion. You need to install the MIT AI2 Companion only once, and then leave it on your phone or tablet for whenever you use App Inventor.
If you can't use the Play Store click here.
2. Connect to the Companion

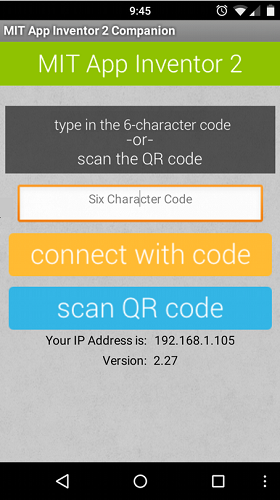 Start up the AI Companion app on your mobile device and click on Scan the QR code (or enter the text code) by pointing your mobile device's camera to the computer screen to read the displayed QR code.
If you have problems, make sure your mobile device and your computer are on the same WiFi or other network. If the app seems frozen, try Connect/Reset Connection and then try Connect/AI Companion again. See the Troubleshooting page or try another method of connecting your device such as USB or using the emulator.
Certificate
You can try more App Inventor tutorials here or ask for the Mobile CSP course to be offered in your school!
